Editing camera raw files in Photoshop involves using the Adobe Camera Raw (ACR) plugin, which allows you to make detailed adjustments to your raw photos before opening them in Photoshop.
We had a blog about CR3 file (link below) so today I will learn how to edit a camera raw file to have an attractive portrait, landscape or real estate photo.
Steps to Edit Raw Photos in Adobe Camera Raw
Some Tips For You to Edit a Photo Effectively
Use 16 Bit Channel
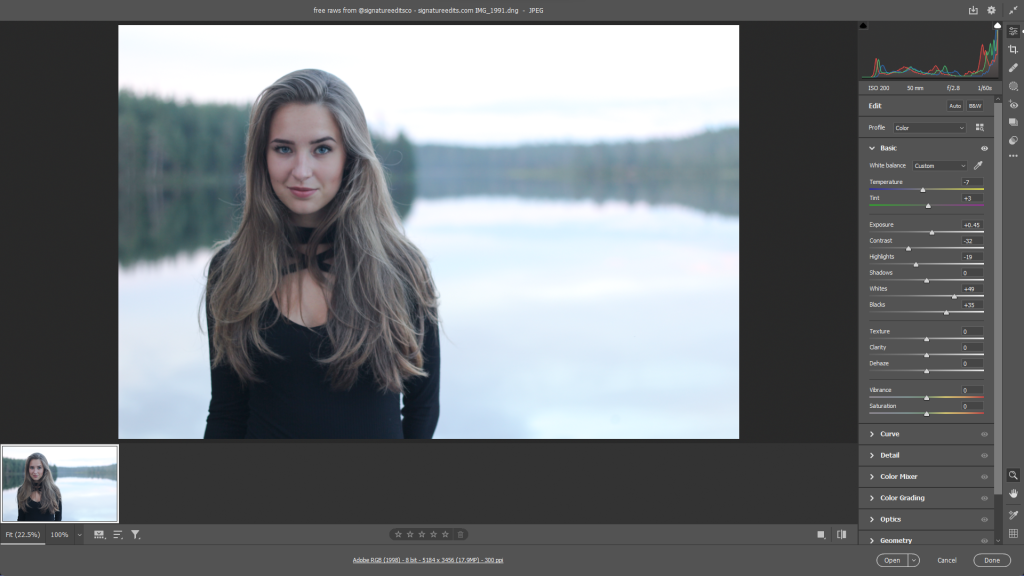
Adobe Camera Raw is the default RAW file manager, often included with Photoshop or Lightroom. If your file doesn’t open, check compatibility. Update Adobe Camera Raw if necessary or convert to .dng using Adobe DNG Converter. Once open, improve editing flexibility by switching to 16-bit channels, usually found in a drop-down menu or link at the bottom of the screen. The steps may vary slightly depending on the software version, but the main process remains the same.
Adjust the White Balance
On the right side, a sidebar offers different sliders. The first two fine-tune white balance. Ideally place it in-camera, but RAW files allow for adjustments. Use the menu presets or the temperature and tone sliders for greater precision. As you adjust, the photo changes, helping you find the right setting. This method can add warmth or coolness to a photo with correct white balance, improving its appearance.
Adjust your Exposure
Adjusting exposure in RAW files is simple. Use the chart in the upper right corner as a guide. The exposure slider will fine-tune the overall exposure. To restore highlights, use the restore slider, and for shadows, use fill light. Experiment with sliders to see their impact. You can always undo adjustments by resetting the slider.
Take a Look at the Contrast
Below the exposure slider, you’ll find options to improve the contrast and detail of your image. The contrast slider adjusts the overall contrast, affecting both shadows and highlights. To make deeper shadows, use the black slider or lighten the highlights with the brightness slider. The Clarity slider improves midrange and detail. These tools provide flexible control over your image’s contrast and texture.
Adjust your Colour
Besides the clarity slider, you’ll find vibrance and saturation sliders, essential for fine-tuning the colors in your photos to suit your aesthetic. Vibrance enhances less dominant colors, while saturation enhances primary colors. Be careful not to overdo it, as excessive adjustments can create the image look unnatural. Finding the right balance is important to achieve natural and beautiful results.
Sharpen and Reduce Noise
JPEG images are automatically enhanced but RAW images do not have this enhancement feature. After adjusting exposure and contrast, go to the sharpness tab (the icon that looks like two mountains). First, zoom the view to 100% for precise sharpness using the magnifying glass tool or by entering “100%” in the zoom box. Avoid over-sharpening to avoid over-processing.
In the same tab, reduce noise in higher ISO images, but be careful as this can reduce fine detail. The top three sliders help reduce overall noise, while the bottom two handle color noise from high ISO settings.
Contact us if you have any questions.
Moreover, Don’t forget at VincentColor we provide Real Estate Photo Editing Service only from 0.5$
Website: https://vincentcolor.com
Email1: Contact@vincentcolor.com
Email2: Cs@vincentcolor.com